
What is the most popular Sitecore development task in 2025? My answer will be: creating components. Sitecore clients move to SitecoreAI (XM Cloud), and it causes fewer and fewer Sitecore customizations. It may be changed over time with the ability to extend Sitecore via the marketplace. But now the biggest amount of work is related to component creation. Let’s figure out how AI can speed up this process!
Prerequisites
Figma
Figma is the de facto standard for web design. It has many AI capabilities by itself. We are not interested in them here. All that we need is the Figma MCP server. It is available starting from the Dev Seat subscription, 15$/month.
Chrome
AI agents work better when they have a feedback loop. Do something, check, improve if required, check again, and continue till the result is achieved. Previously, it was required to run non-official MCP servers for browser tools. But Google introduced Chrome DevTools MCP in September 2025. It is free and works great!
Sitecore
Of course, you will need Sitecore. It is possible to have the source code locally and run a headless Next.js(or Astro) server on the development machine and work with SitecoreAI (XM Cloud).
But for our case, we will run the fork of the latest official Sitecore Demo website: Verticals. It is probably a little bit dated, but that is the best free open-source Sitecore project that we can use.
AI Agents
Now, we need to glue everything together. This approach will likely work with all modern AI tools and agents. I tried it with Claude Code and Cursor, and both work well. Here, we will be using a Cursor Pro with 20$/month subscription. The only reason for Cursor selection is: ability to provide better screenshots that explain how it works.
Setup
We configure everything together in Cursor. First of all, I cloned the repository and started Sitecore.
The repository already comes with and running MCP server. After starting Sitecore, we have the Sitecore and the MCP server for Sitecore available to AI Agents. Item service tools and PowerShell tools for working with presentations should be enabled. All other tools could be disabled to improve AI agents quality and performance.
Google Chrome DevTools MCP server could be started via one command: npx chrome-devtools-mcp@latest.
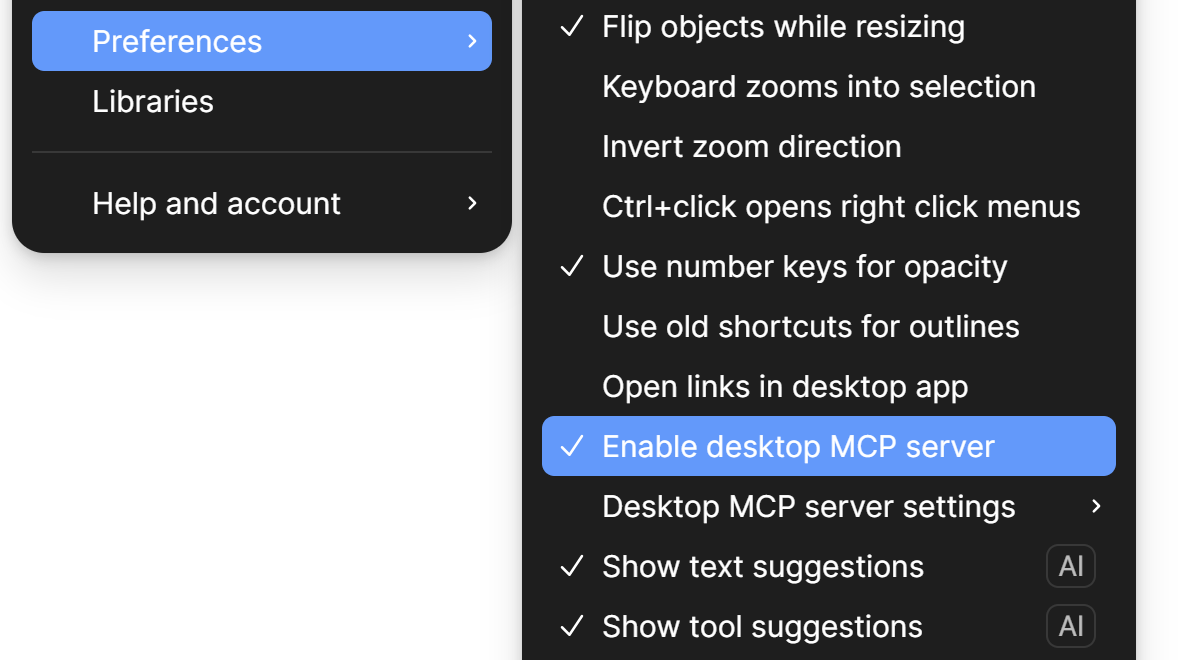
We will need to run Figma Desktop to start the MCP server. It starts from the menu:
Once it is started, it should be available on the port 3485
Our mcp.json configuration will be next:
{
  "mcpServers": {
    "Sitecore Local": {
      "url": "http://127.0.0.1:5001/mcp"
    },
    "Figma": {
      "url": "http://127.0.0.1:3845/mcp"
    },
    "Chrome DevTools": {
      "command": "npx",
      "args": ["chrome-devtools-mcp@latest"]
    }
  }
}
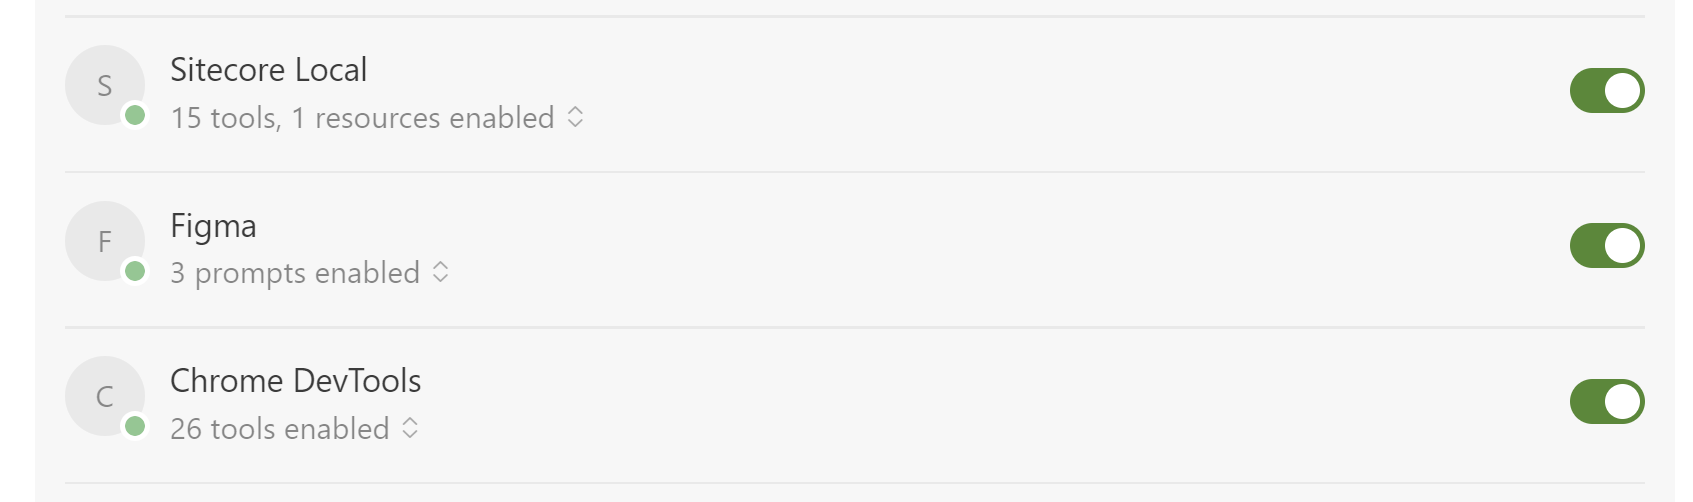
After proper configuration, we should see all three servers enabled in Cursor:
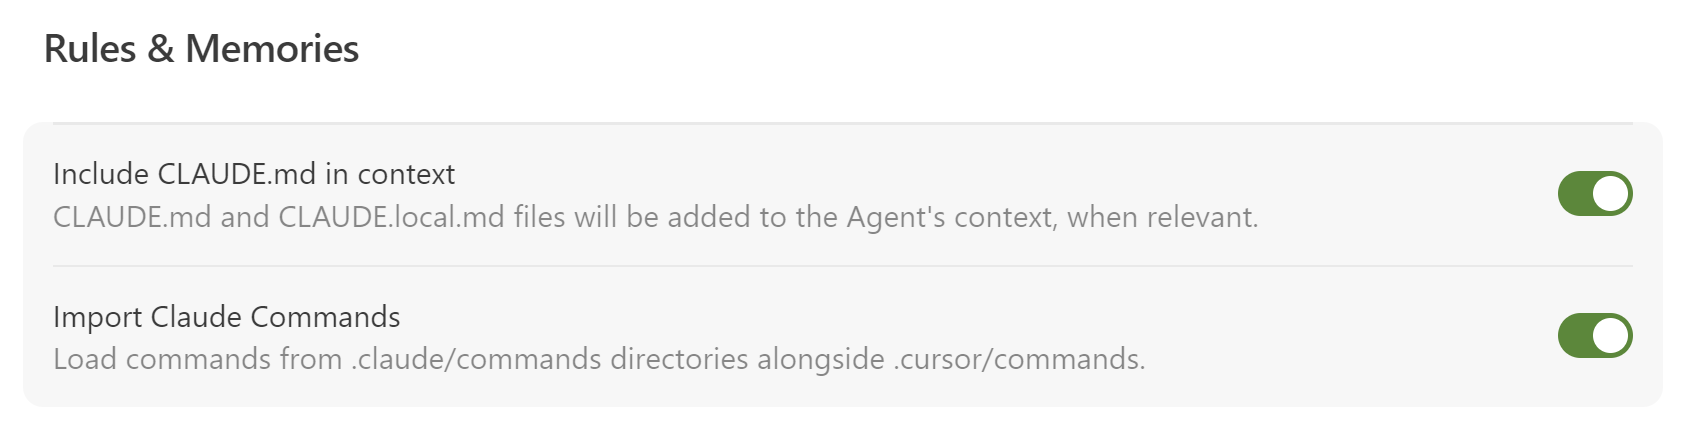
Another important thing for generating content is Rules and Memories. We will include CLAUDE.md in the Agent’s context when relevant.
It is important because we don’t want to repeat the same things in all prompts.
CLAUDE.md contains:
- Constants: Site path, templates paths, etc. Anything valuable.
- URLs for your projects to let AI know what to compare in Chrome DevTools
- Rules to create templates, renderings, and other content
- Rules for styling
- Rules for serialization
Actually, everything works even without additional specification in CLAUDE.md. But in that case, you need to provide more details in your prompts. Also, you can use User Rules or Project Rules if you think that they fit better for your needs. The reason for my selection on CLAUDE.md is: write it once, use it in both Claude Code and Cursor.
Process
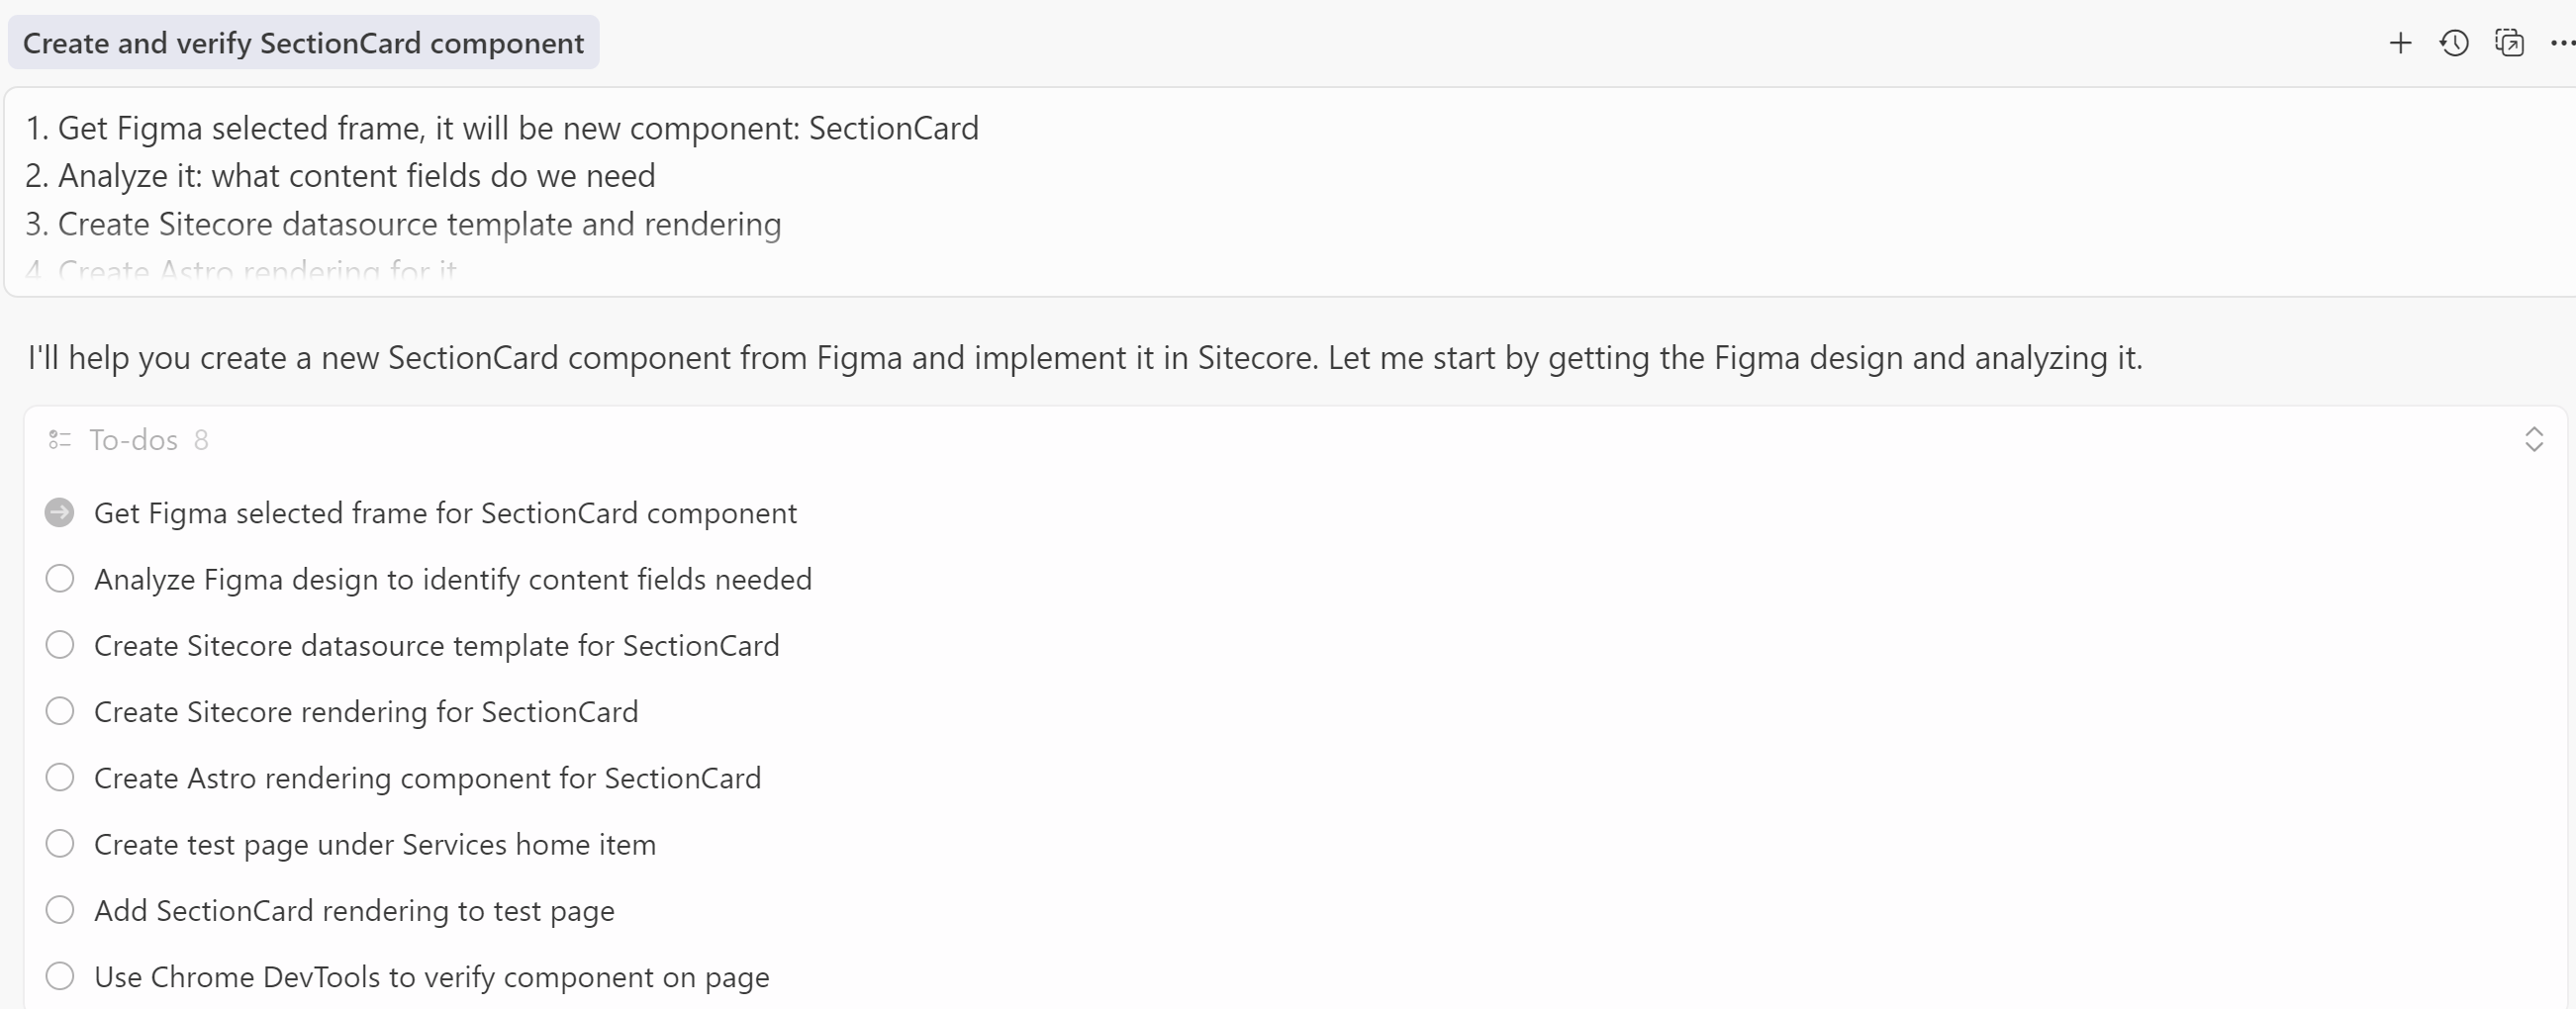
Now, we should go to Figma and select the component that we want to create. It is possible to either use the selected Figma context or specify how to find it in the document. We will use the first one.

Then we need to go to the Cursor and start a new chat with our Agent.
- Get Figma selected frame, it will be new component: SectionCard
- Analyze it: what content fields do we need
- Create Sitecore datasource template and rendering
- Create Astro rendering for it
- Create test page under the home item of Services website
- Add this rendering to the test page
- Use Chrome MCP Dev tools to verify if component was added to the page. Check if looks correctly, if not - fix it
You should see that Cursor prepared the plan and started to work on it.
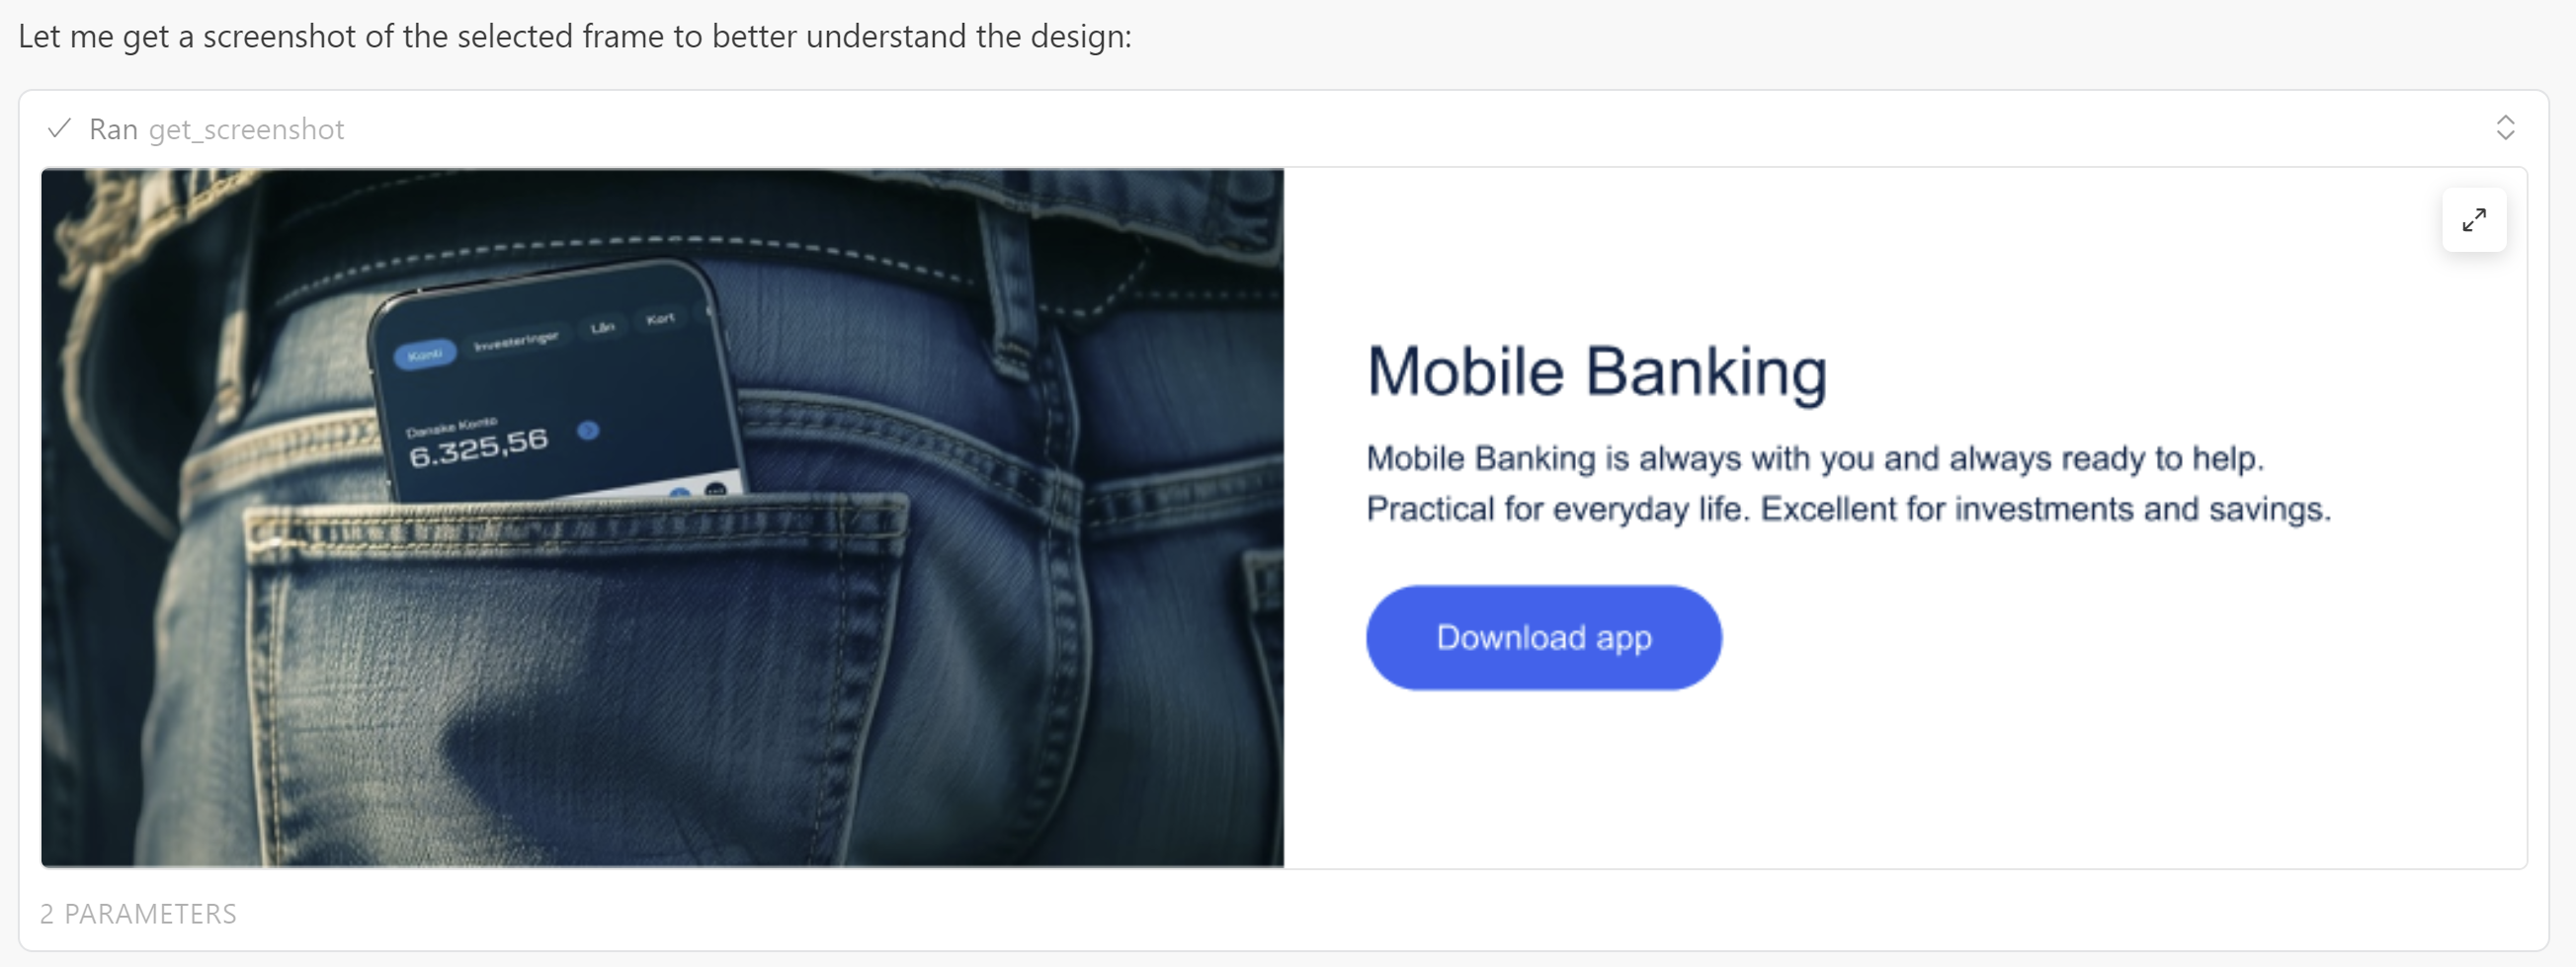
It took a Figma screenshot:
Analyzed the Figma Context:

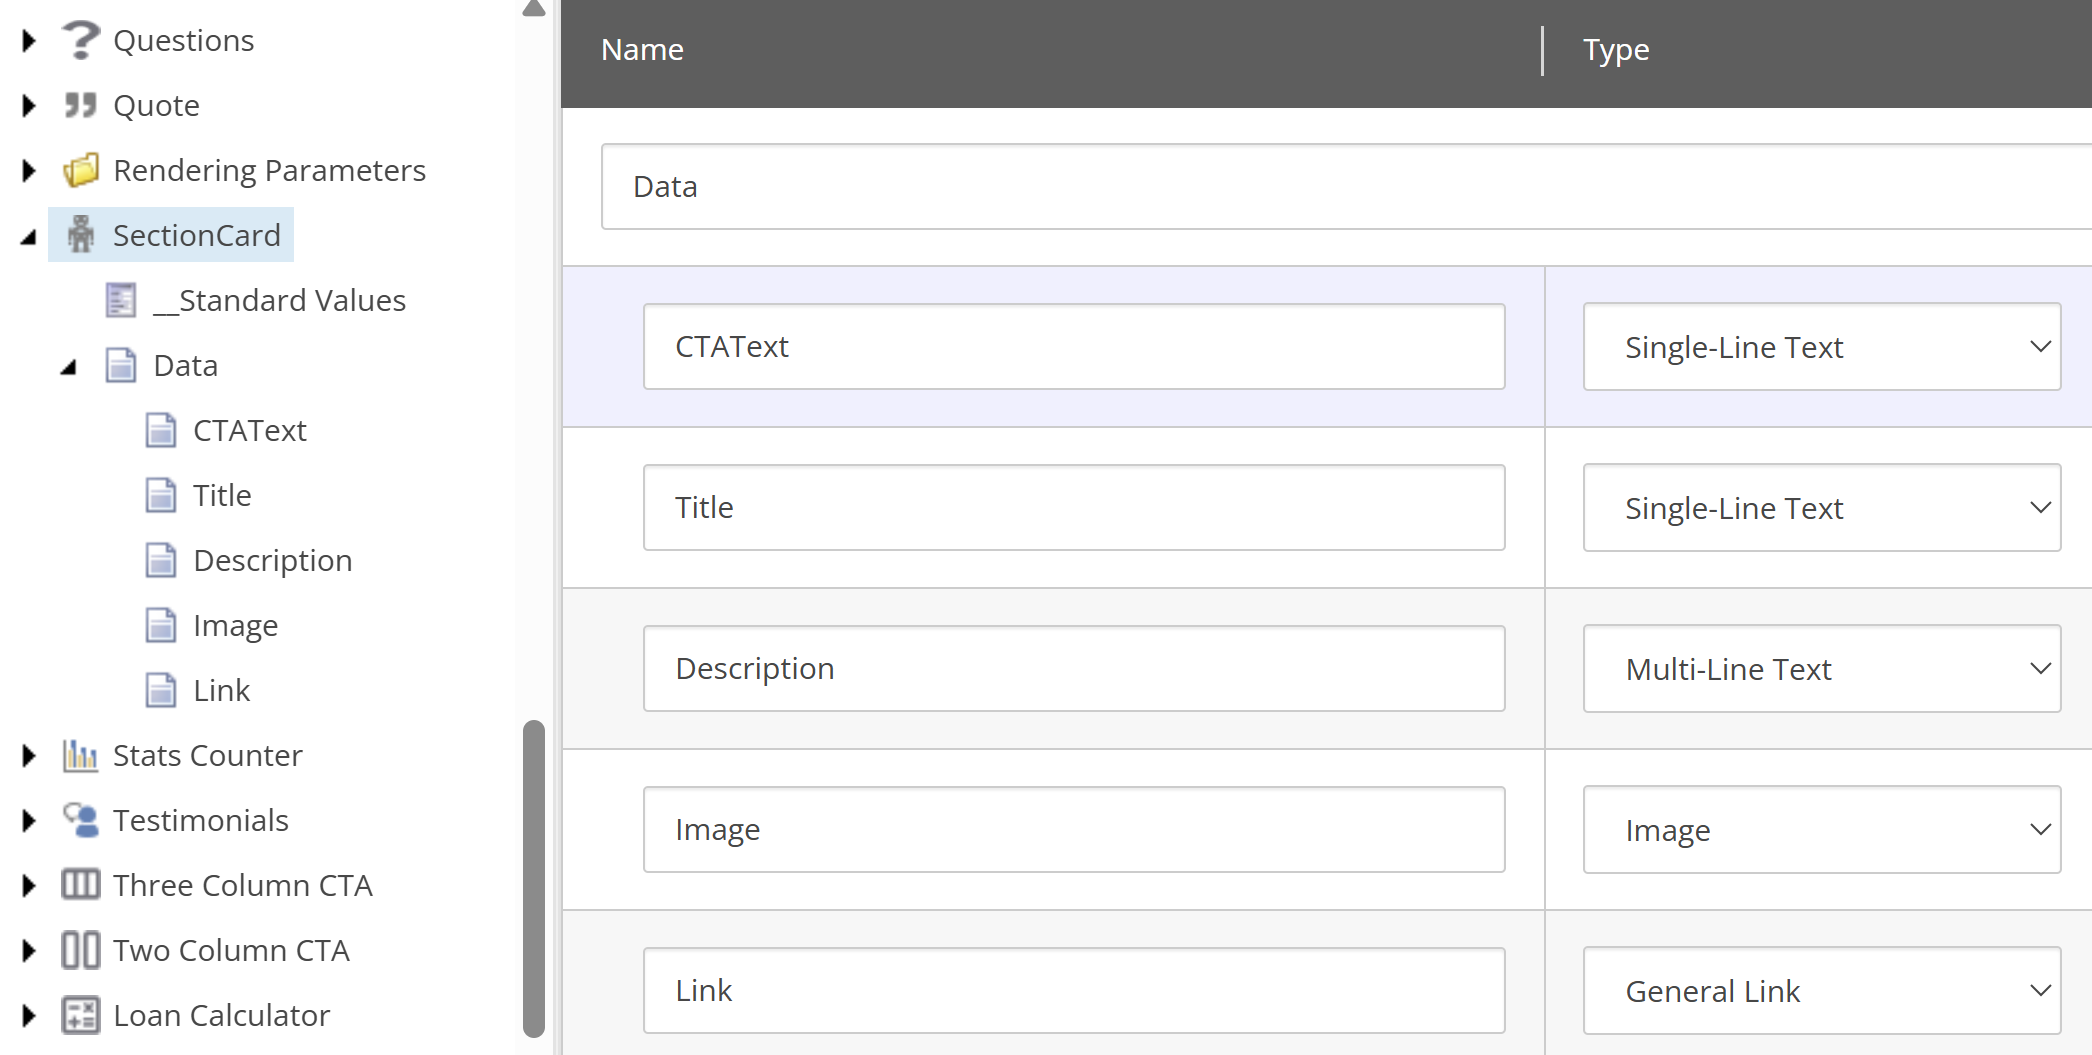
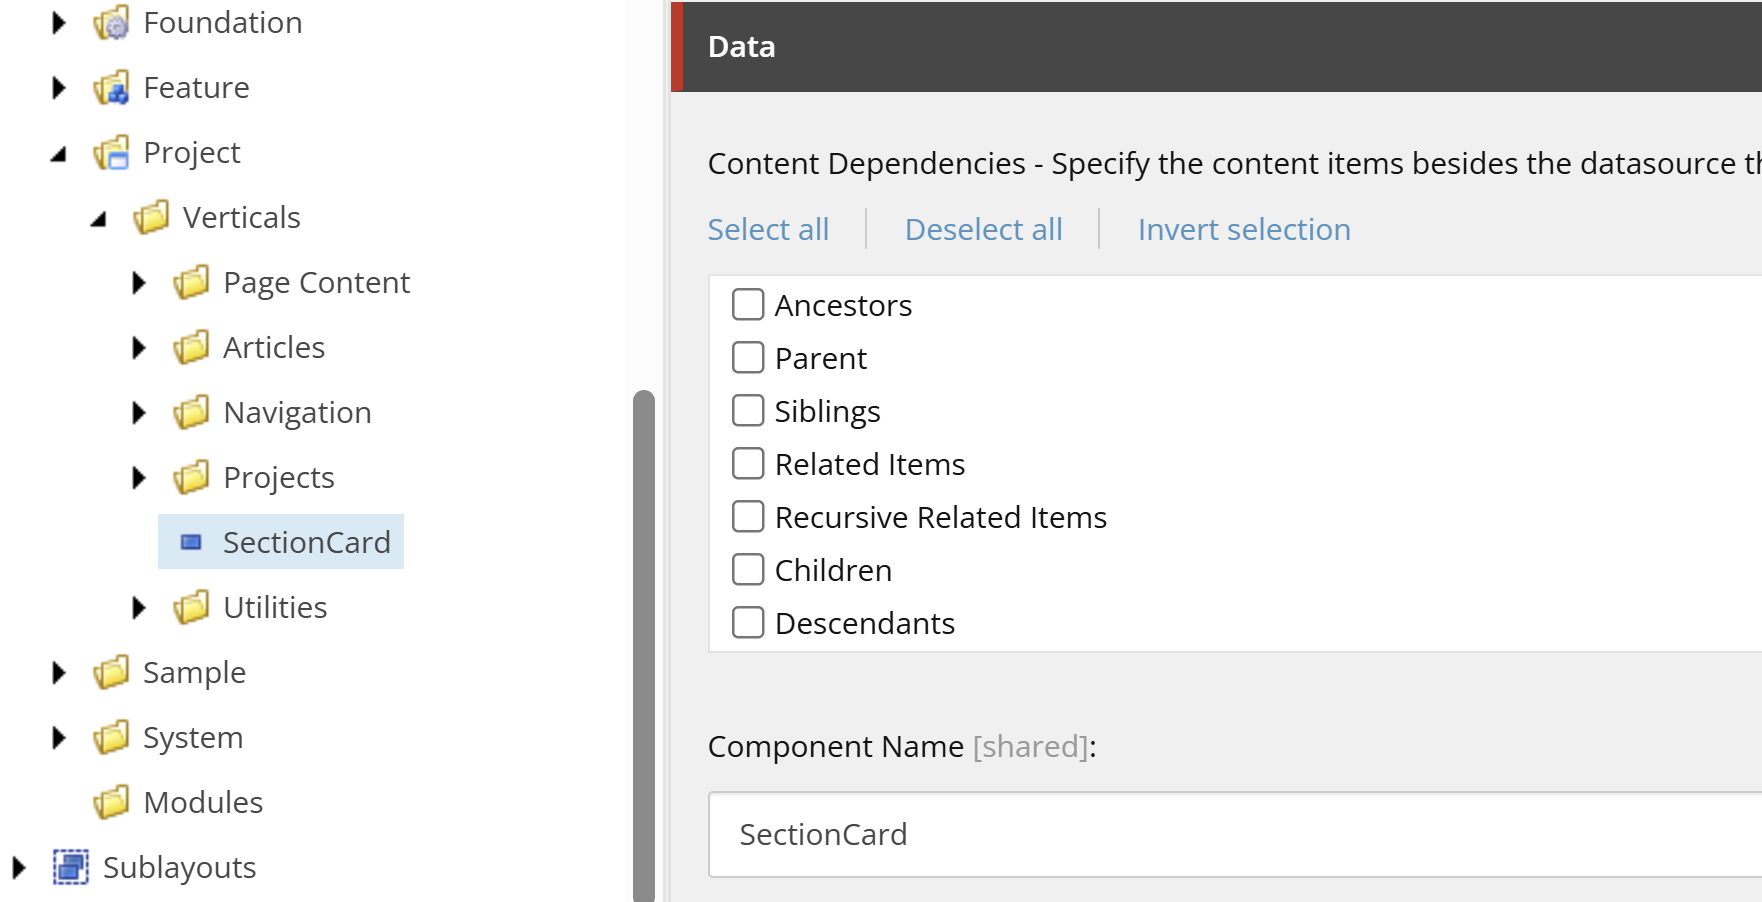
And started to work on Sitecore items. We can follow it in chat or check the action results in Sitecore.
Template was created:
Rendering as well:
Rendering source file was created:
@ -0,0 +1,61 @@
---
import {
  Field,
  ImageField,
  RichTextField,
  LinkField,
  AstroImage,
  Text,
  RichText,
  Link,
  SitecoreContextMap,
} from "@astro-sitecore-jss/astro-sitecore-jss";

interface Fields {
  Title: Field<string>;
  Description: RichTextField;
  Image: ImageField;
  Link: LinkField;
  CTAText: Field<string>;
}

export type SectionCardProps = {
  params: { [key: string]: string };
  fields: Fields;
};

const props: SectionCardProps = Astro.props.route;
const id = props?.params?.RenderingIdentifier;
const sitecoreContext = SitecoreContextMap.get()["scContext"];
const isPageEditing = sitecoreContext.pageEditing;
---

<div
  class={`component section-card ${props?.params?.styles.trimEnd()}`}
  id={id ? id : undefined}
>
  <div class="container">
    <div class="section-card-content">
      <div class="section-card-image">
        <AstroImage field={props.fields.Image} class="hero-image" />
      </div>
      <div class="section-card-text">
        <div class="section-card-title">
          <Text field={props.fields.Title} />
        </div>
        <div class="section-card-description">
          <RichText field={props.fields.Description} />
        </div>
        {
          (isPageEditing || props.fields?.Link?.value?.href) && (
            <div class="section-card-cta">
              <Link field={props.fields.Link} class="cta-button">
                <Text field={props.fields.CTAText} />
              </Link>
            </div>
          )
        }
      </div>
    </div>
  </div>
</div>
Styles for rendering were also created:
.component.section-card {
  width: 100%;
  margin: 0 auto;
  padding: 2rem 0;

  .container {
    max-width: 1200px;
    margin: 0 auto;
    padding: 0 1rem;
  }

  .section-card-content {
    display: flex;
    align-items: center;
    gap: 2rem;
    min-height: 330px;

    @media (max-width: 768px) {
      flex-direction: column;
      gap: 1.5rem;
    }
  }

  .section-card-image {
    flex: 0 0 588px;
    height: 330px;
    overflow: hidden;
    border-radius: 8px;

    @media (max-width: 768px) {
      flex: none;
      width: 100%;
      height: 250px;
    }

    .hero-image {
      width: 100%;
      height: 100%;
      object-fit: cover;
    }
  }

  .section-card-text {
    flex: 1;
    padding: 0 1rem;

    @media (max-width: 768px) {
      padding: 0;
    }
  }

  .section-card-title {
    margin-bottom: 1rem;

    h1, h2, h3, h4, h5, h6 {
      font-family: Arial, sans-serif;
      font-size: 32px;
      font-weight: normal;
      color: #002346;
      line-height: 40px;
      margin: 0;

      @media (max-width: 768px) {
        font-size: 28px;
        line-height: 36px;
      }
    }
  }

  .section-card-description {
    margin-bottom: 1.5rem;

    p {
      font-family: Arial, sans-serif;
      font-size: 15.9px;
      color: #002346;
      line-height: 24px;
      margin: 0 0 0.5rem 0;

      &:last-child {
        margin-bottom: 0;
      }
    }
  }

  .section-card-cta {
    .cta-button {
      display: inline-block;
      background-color: #0a5ef0;
      color: white;
      text-decoration: none;
      padding: 12px 24px;
      border-radius: 50px;
      border: 1px solid #0a5ef0;
      font-family: Arial, sans-serif;
      font-size: 16px;
      font-weight: normal;
      line-height: 17.6px;
      text-align: center;
      transition: all 0.3s ease;

      &:hover {
        background-color: #0847c7;
        border-color: #0847c7;
        color: white;
        text-decoration: none;
      }

      &:focus {
        outline: 2px solid #0a5ef0;
        outline-offset: 2px;
      }
    }
  }
}
And it was added to the newly created test page:
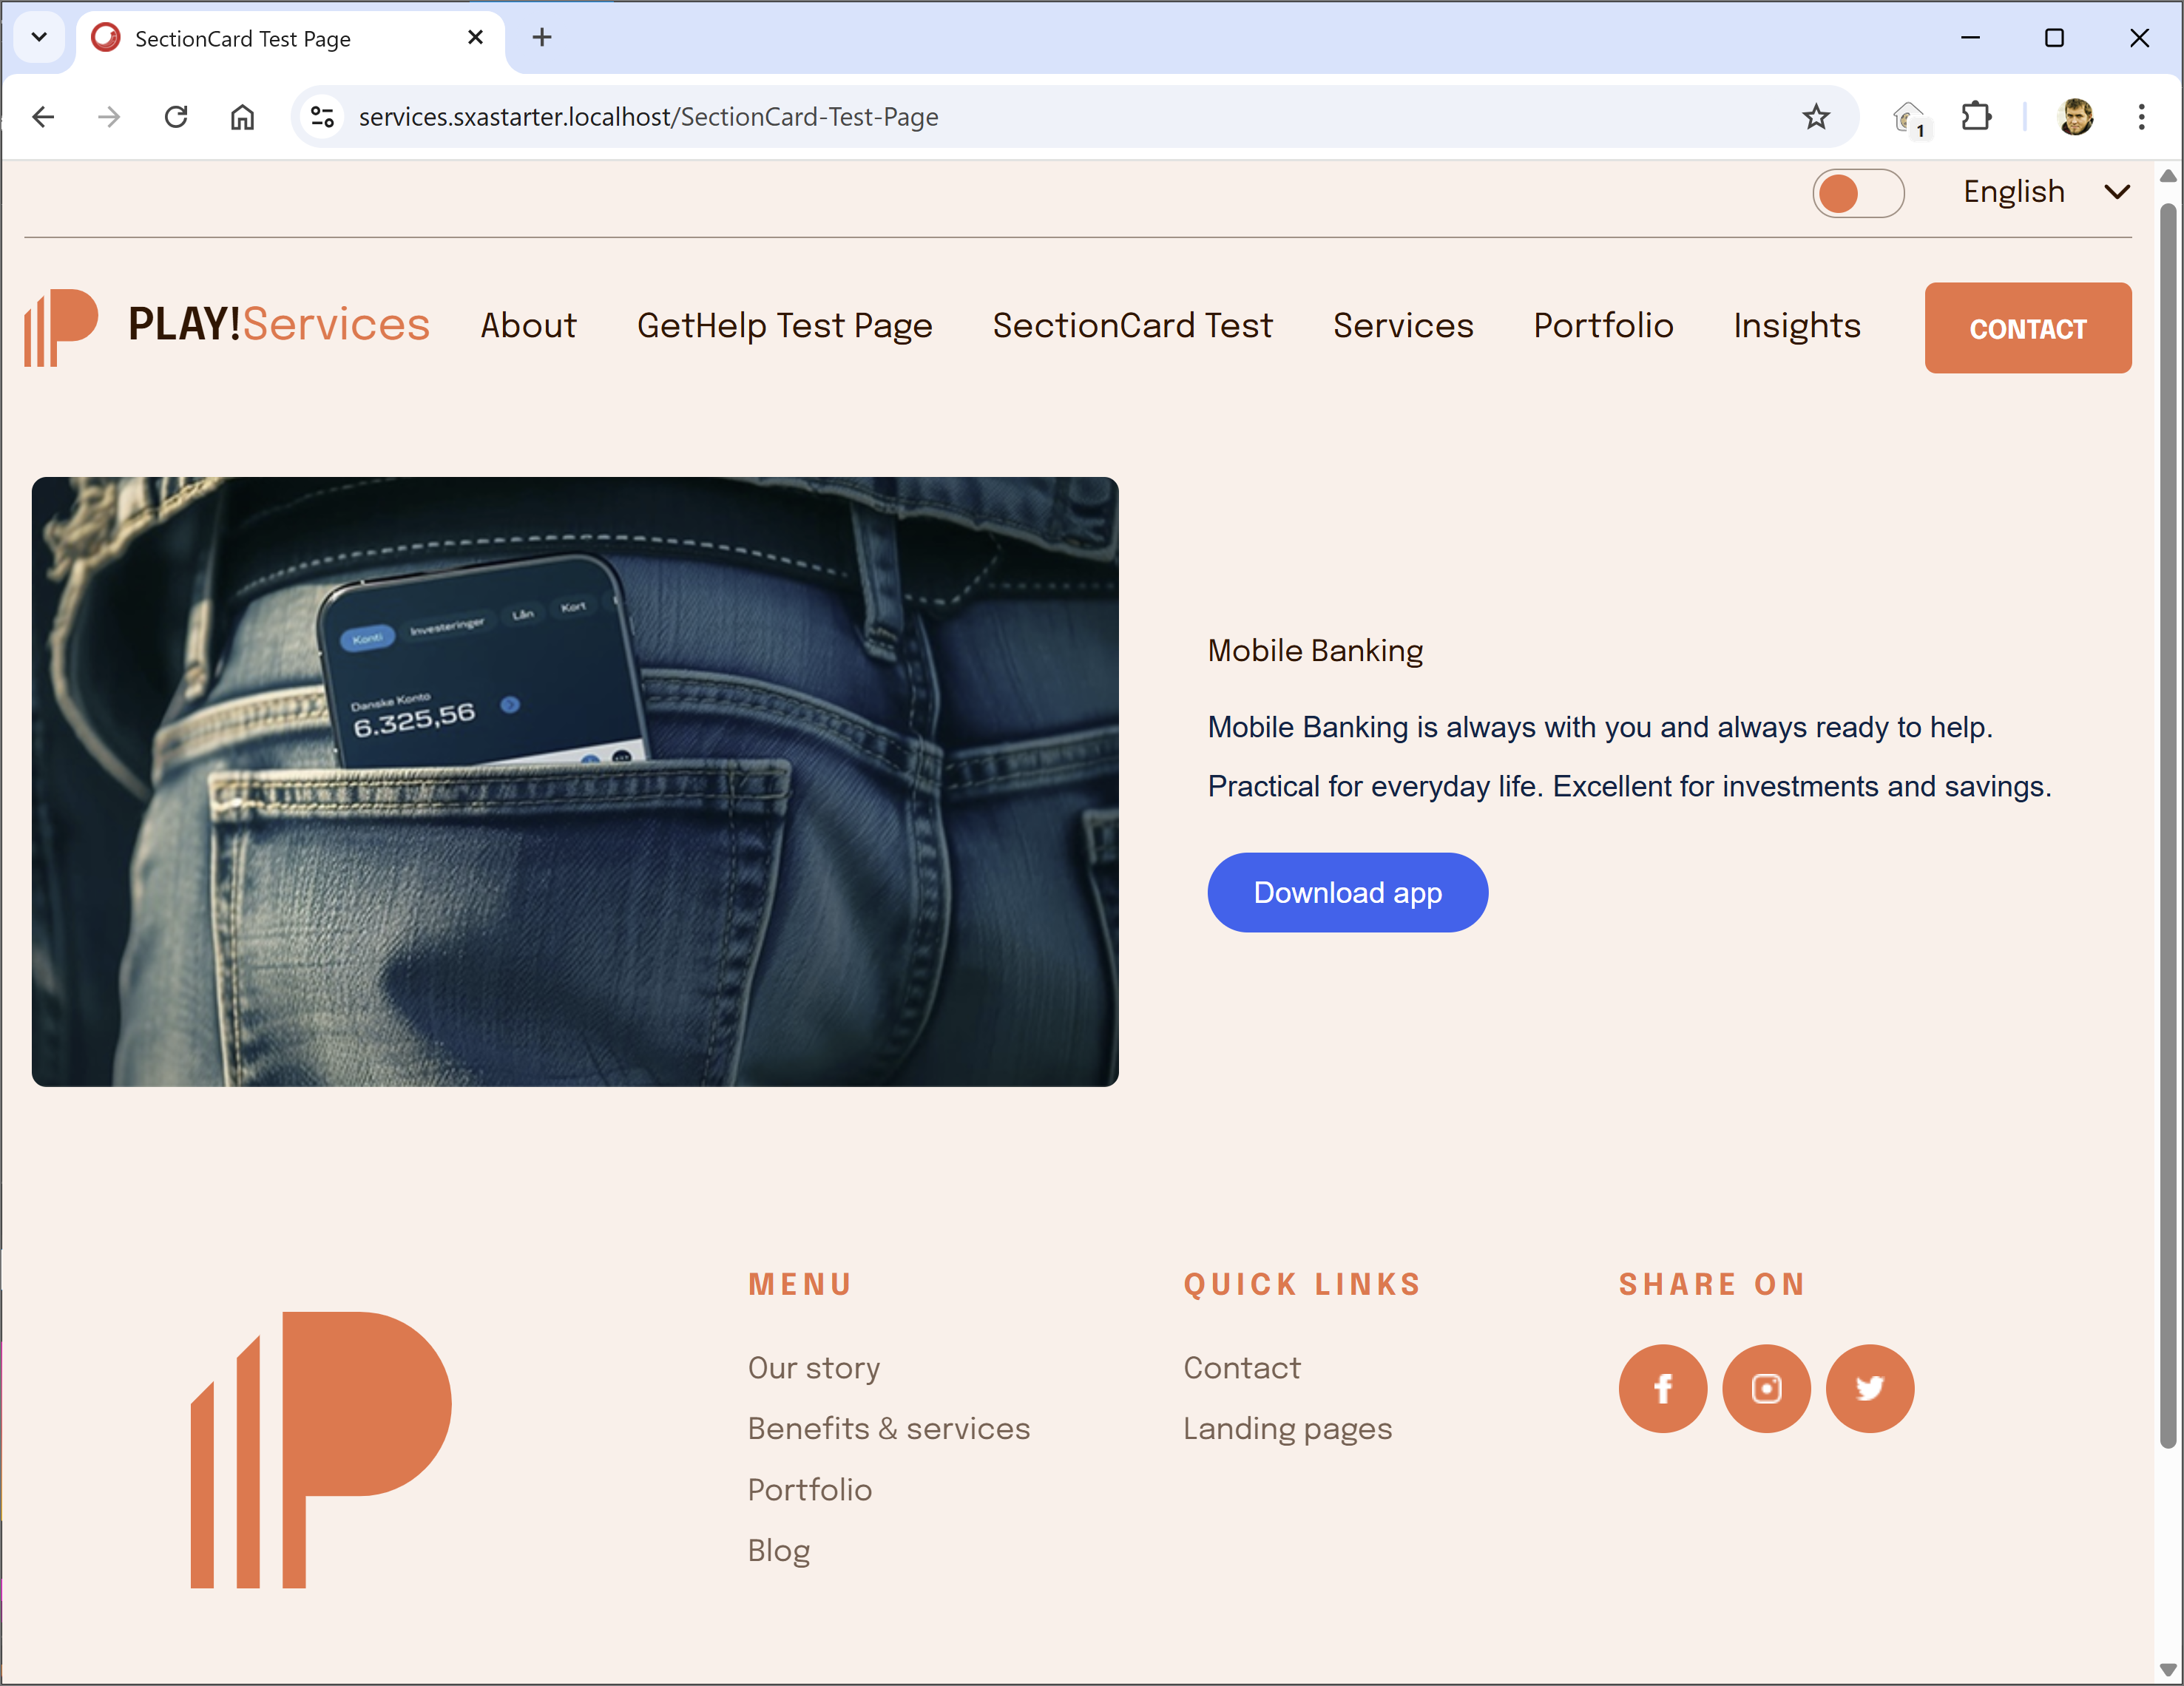
And the component on the page looks ok. Everything is inline editable: Image, Title, Description, Button link. There are some issues with styles: wrong corner radius for the image, font sizing, etc. Now, we can ask the AI agent to adjust styles or make manual changes.
Code Review
There are a bunch of files that are ready to commit: serialization for template, rendering, test data, styles, and rendering itself.
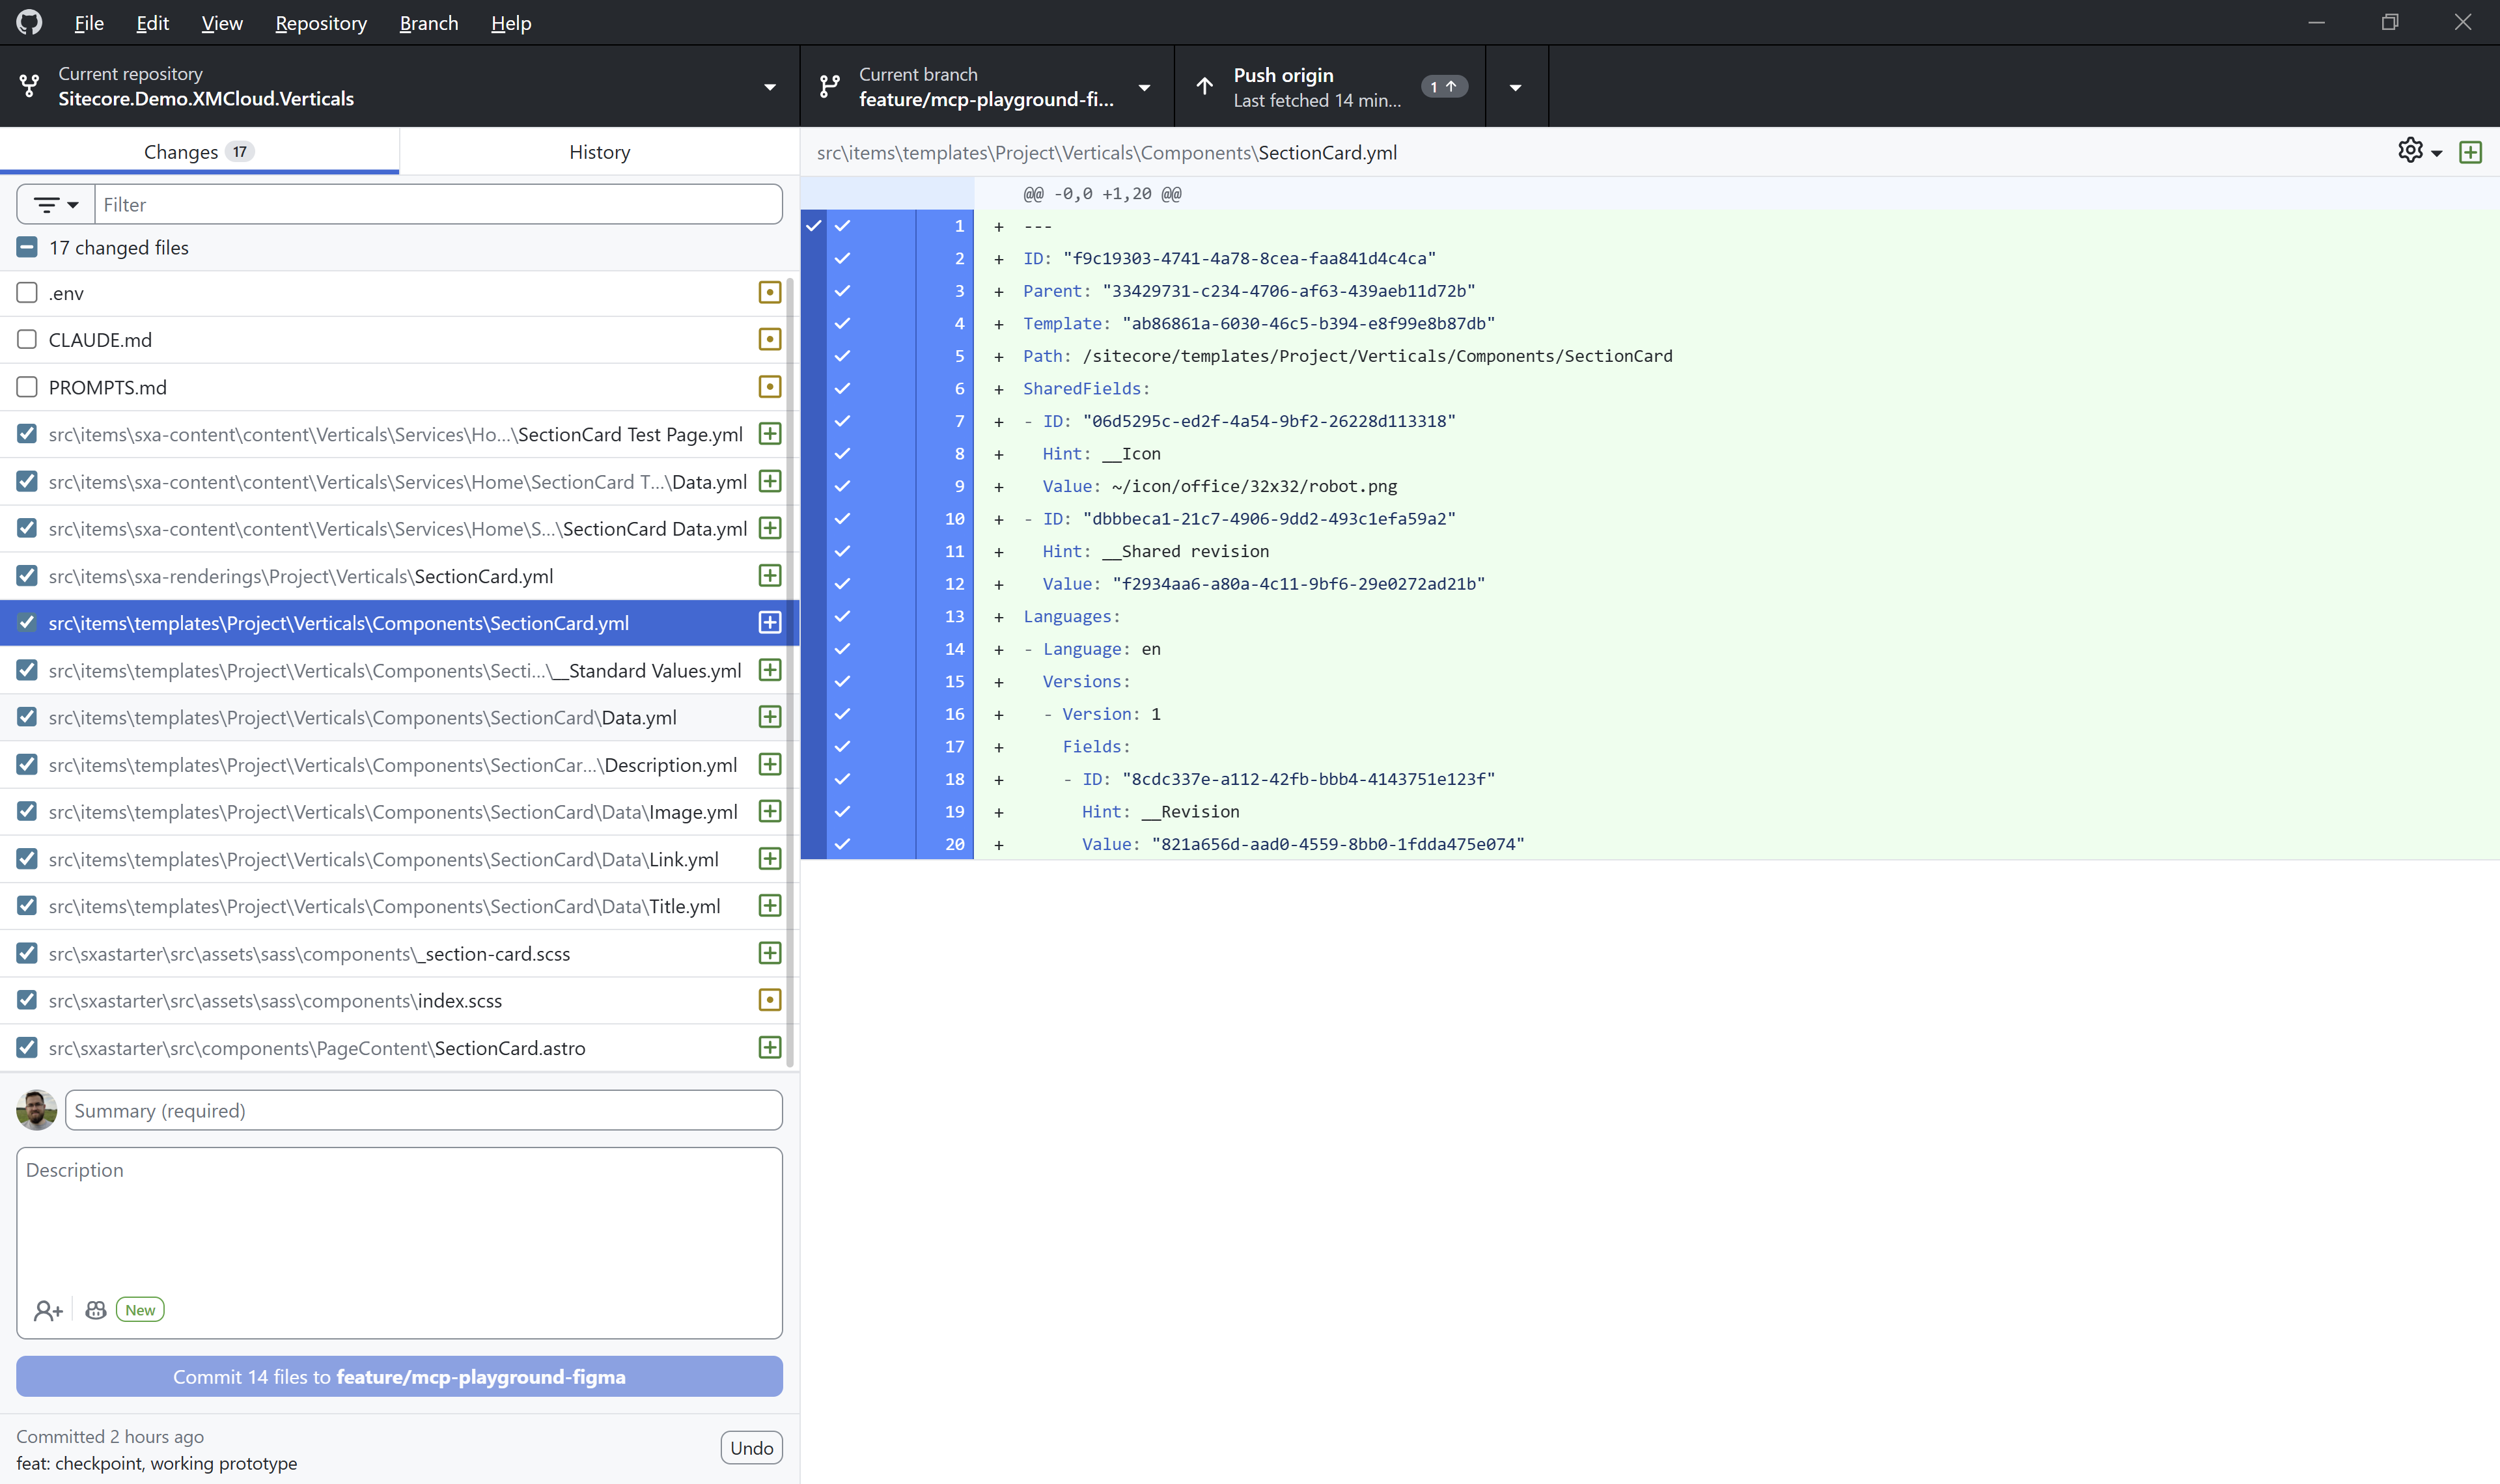
Let me review them. They are not production-ready. They are more like a good starting point for development. You have all the required items in place, you have all the files in place, and you need only to improve them. You can do it manually or using AI agents.
Sitecore Items
They look ok. Template, Rendering, Test Items. Everything is present. All fields are in place. Nothing is missed. The better is Figma design naming, the better the result. And everything is according to the rules. And it is possible to achieve a different result depending on your rules in CLAUDE.md file.
Only minor improvements could be required, like rendering location and items icons.
Rendering
The rendering code looks great and does not require any changes. It is simple and does everything that is required.
Styles
Styles has some problems. They require changes to be pixel-perfect according to the design. And they need code improvements. Colors and sizes should be moved to variables. Things like buttons should be reusable on the project level. But I can forgive these problems in this case. The new component doesn’t follow the whole design system; there is nothing to reuse. It works much better if the components that you add to Sitecore follow existing styling. It is capable of finding and reusing required things.
Conclusion
AI Agents equipped with Sitecore MCP, Figma MCP, and Chrome DevTools MCP servers could be a powerful tool in your day-to-day work. Now, everyone can create Sitecore components. Even if you are a non-technical person(designer, author, project manager), you can create a new rendering that could be used for some temporary promo or campaign. You don’t need to know Sitecore, Next.js, Astro, HTML, JavaScript, TypeScript, CSS, SCSS, or Tailwind. But it should be used only as a temporary(at least for now) solution.
If you are a developer, you get a great companion that does all the boring work for you. You save your time for interesting and challenging tasks.
This approach could be very beneficial at the project start. You can get all the rendering and data structure in a week, and the content team can start their work. Components creation is not a bottleneck anymore. You can scaffold them using an AI agent and work on improvement.
Also, this approach makes Sitecore a competitor for low-code CMS-like services: Figma Sites, Framer, or Webflow.